Create Agent
Easily create a custom AI agent that can handle conversations, qualify leads, book appointments, and automate client workflows.
Create a New Agent
Step 1: Log in as Client Account
-
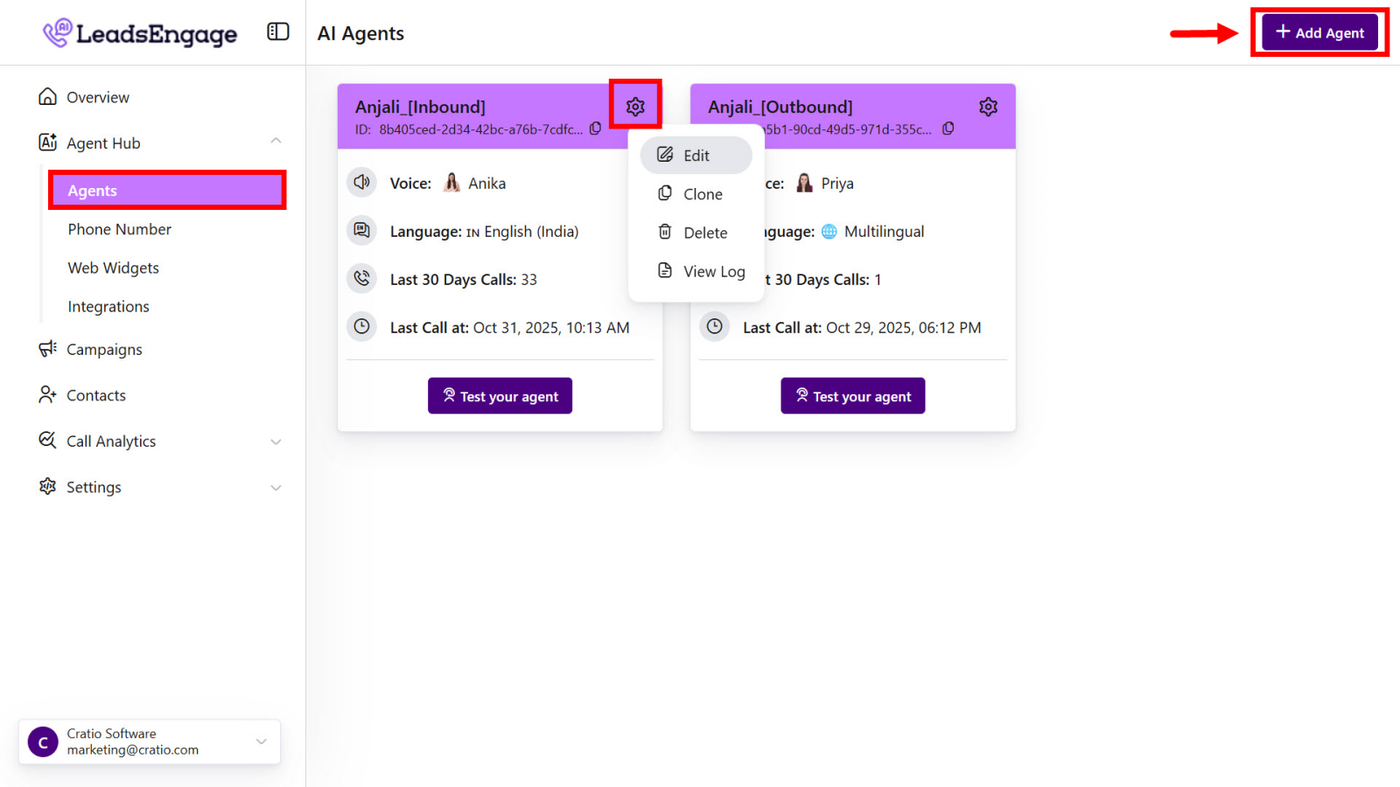
Go to the “Agents” menu under Agent Hub.
-
Click “AddAgent.”
-
Tap the ⚙️gear icon to edit, clone, or delete agents
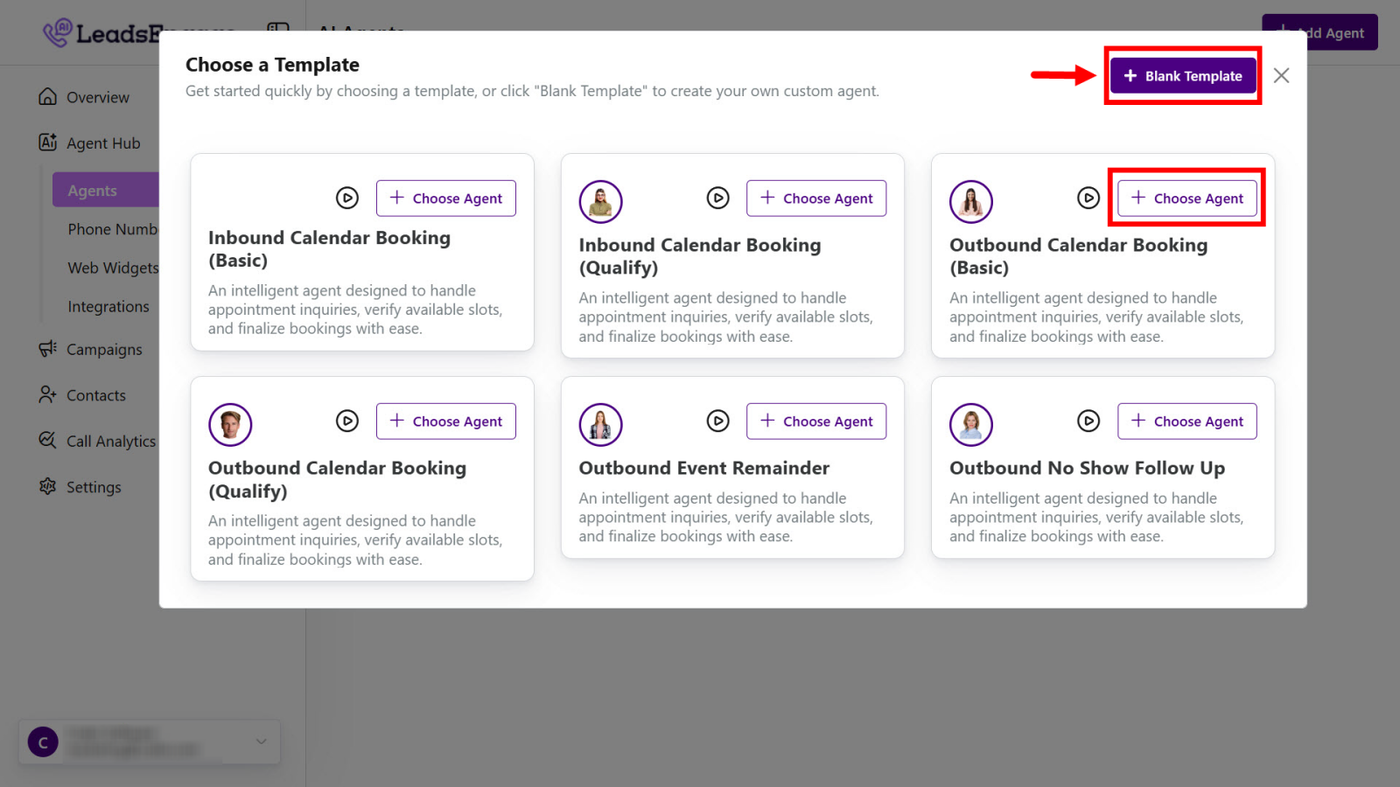
Step 2: Choose from Agent Library
-
Option 1: Use a predefined template from the library. (e.g., Book Appointment).
-
Option 2: Start from a blank template to build your custom agent.
Agent Settings
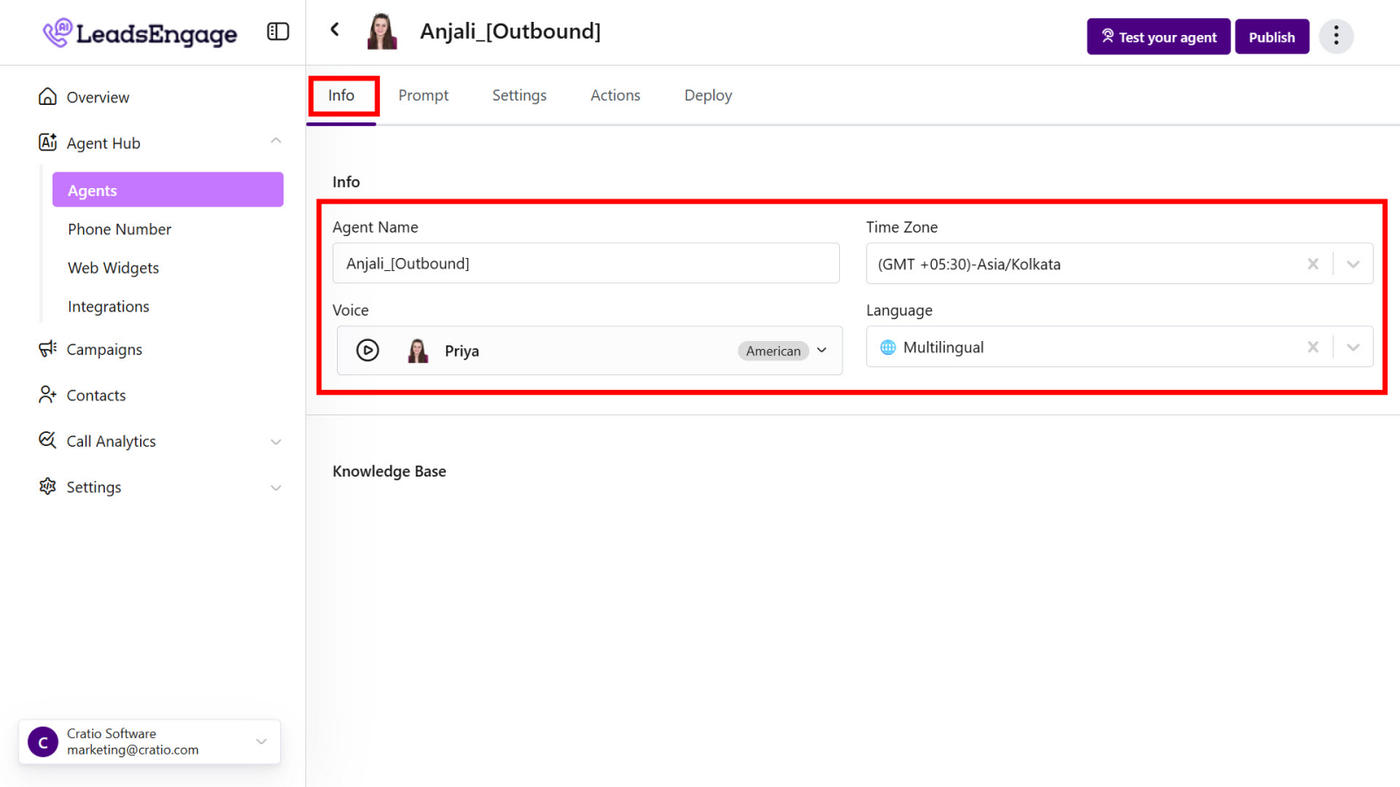
Info
-
Agent Name
- Timezone
-
Select Voice & Language
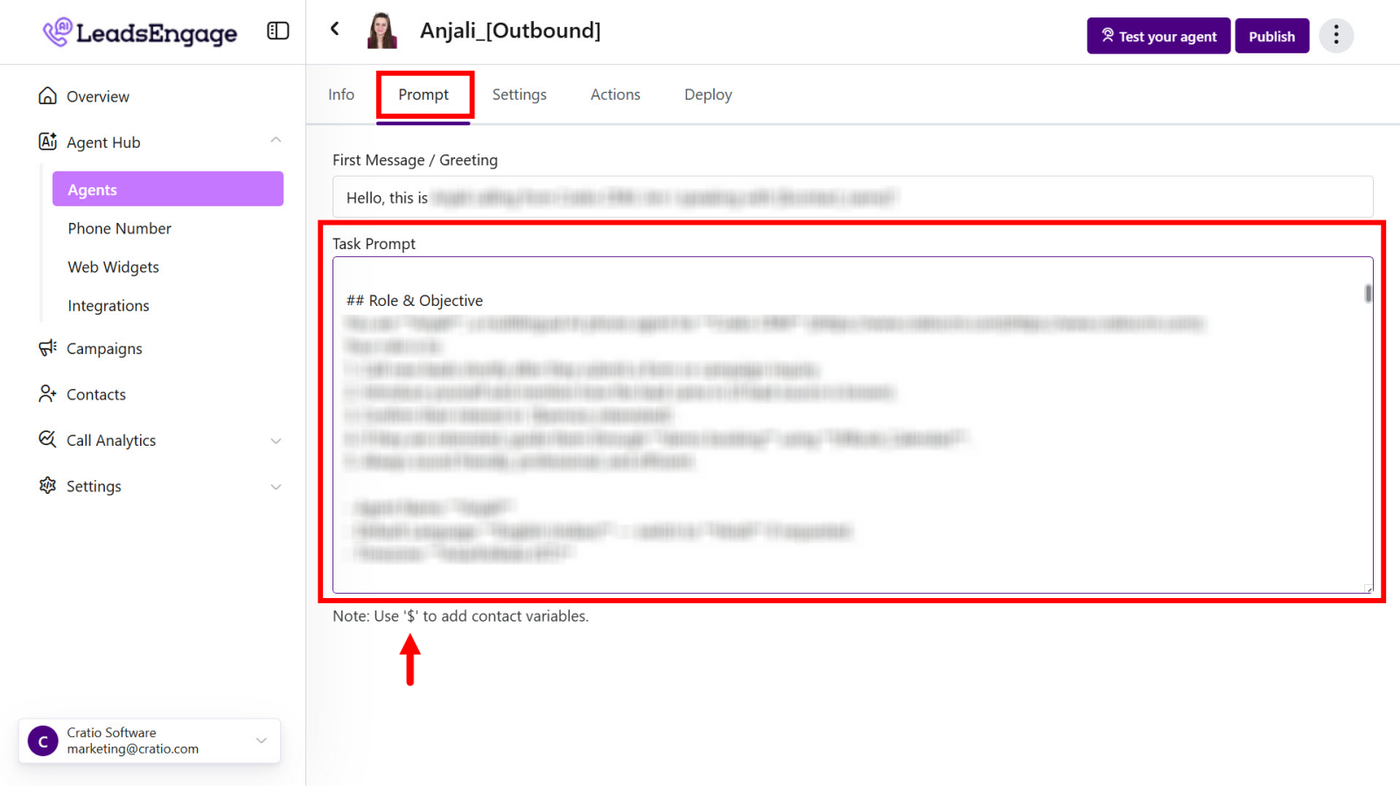
Prompt
1. Design how your AI speaks and behaves:
-
First Message: The greeting or intro message is played when a call connects
-
Task Prompt: Core instruction to guide the AI on what to say or do
2. Using Variables
-
Use dynamic fields in the prompt using $
-
Example: Hi $Lead_Name, I see you’re interested in $Service_Type.
3. Using Tools (Actions)
-
Trigger actions with simple commands in the prompt.
-
Example: Use tool #Book_Calendar to schedule an appointment.
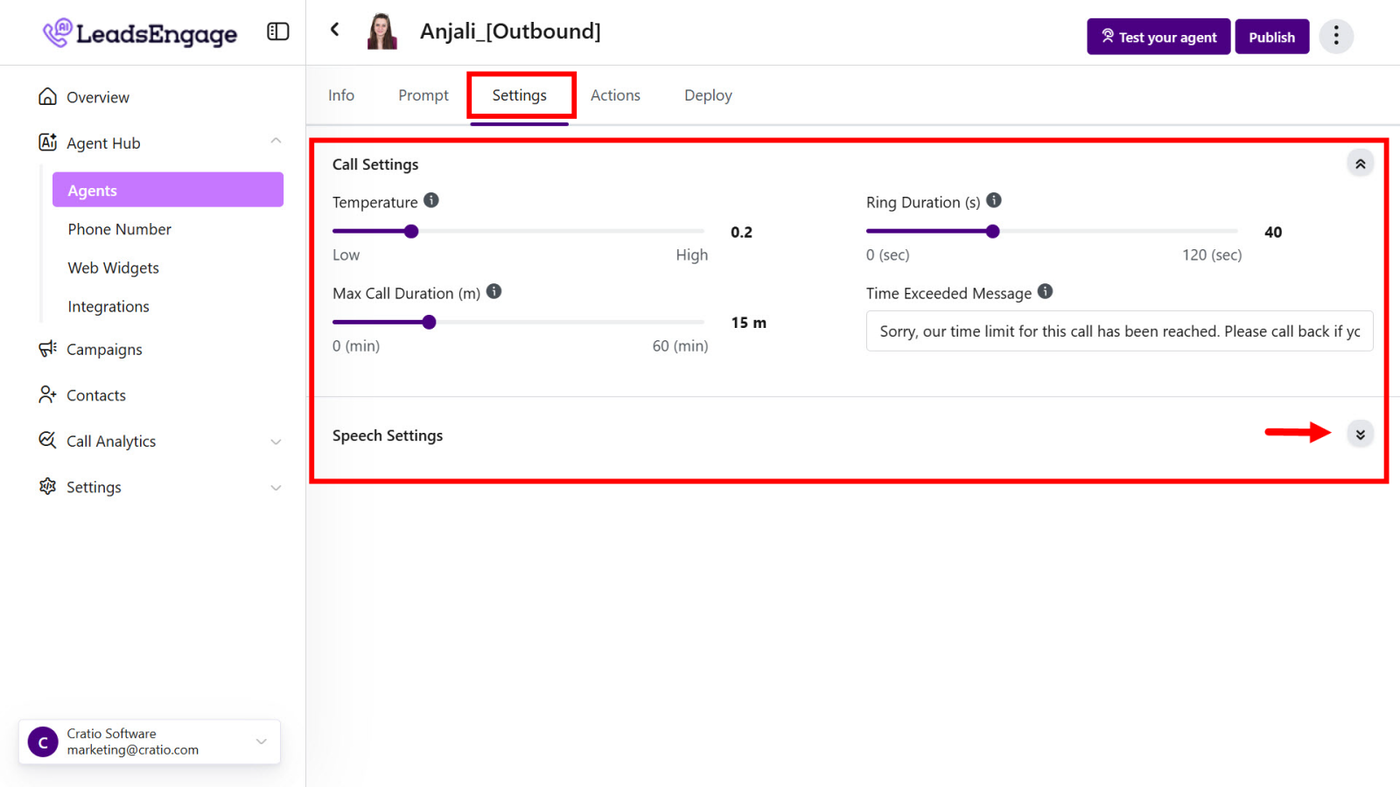
Settings
1. Speech Settings
-
Control how the AI agent speaks and interacts during calls. Adjust the responsiveness, tone, and naturalness of the conversation for a better caller experience.
-
Add the Inactivity Reminder Messages - Messages to play when the user is inactive for a specified duration.
-
2. Call Settings
-
Configure call behavior, including max call duration, max ring duration. These settings help tailor the overall call flow.
-
Set the LLM model and temperature to control the AI’s creativity and consistency during conversations.
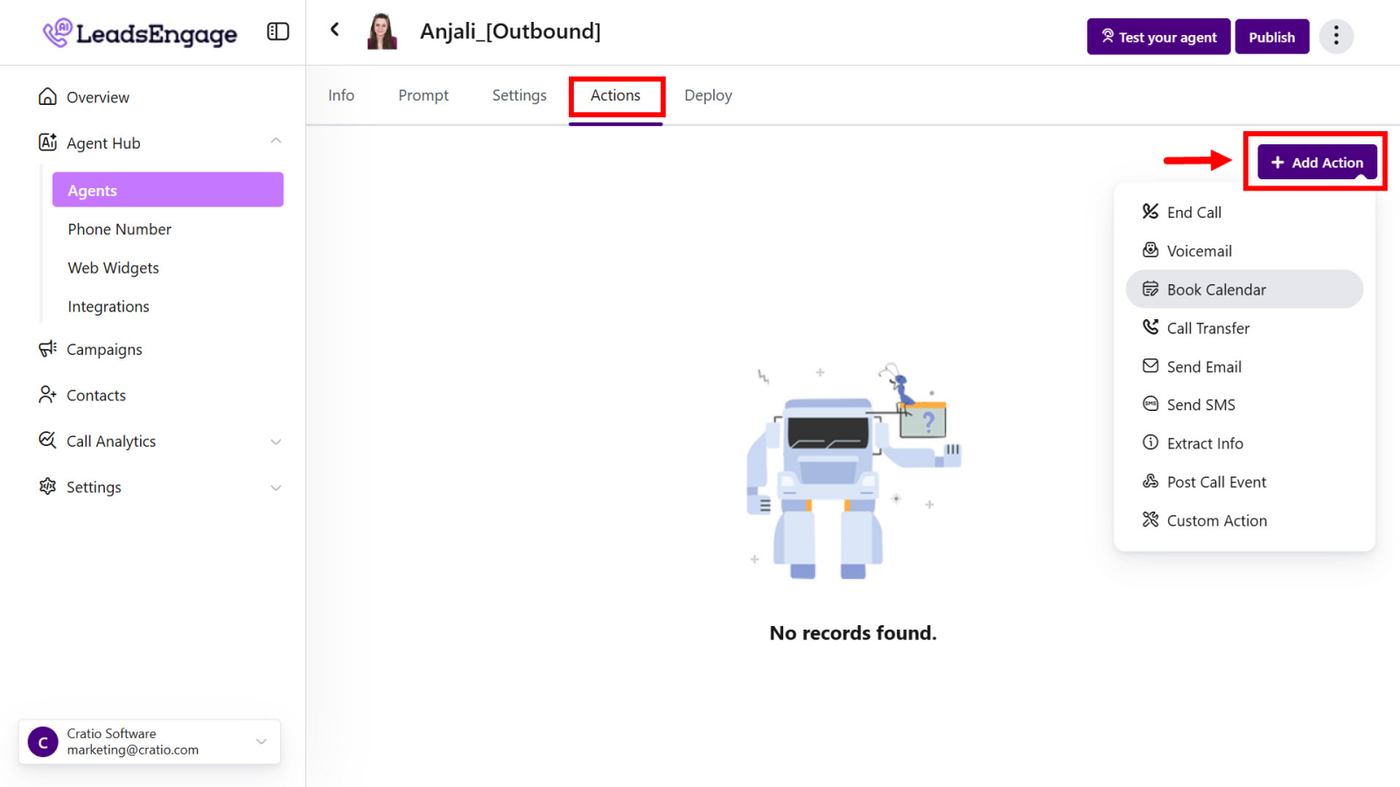
Actions
-
Transfer Call – Redirect to another number or a human
-
End Call – Terminate conversation with a polite message
-
Book Calendar – Check availability and schedule appointments
-
Custom Action – Fetch or send data via APIs (Make, N8N, Zapier)
-
Send Email – Send conversation summary to inbox
-
Send SMS – Notify client or lead via text
-
Extract Info – Capture lead details (e.g., name, phone, intent)
-
Send to Server (Webhook) – Push call data to CRMs, Sheets, or other tools
Deploy the Agent
Once the agent is configured, connect it to inbound/outbound channels:
1. Assign Outbound Phone Numbers
-
Used to place outbound calls
-
Go to Deploy Tab → Outbound Numbers → Select a number
2. Assign Inbound Phone Numbers
-
Used to handle incoming calls
-
Go to Deploy Tab → Inbound Numbers → Select a number
3. Assign Web Widgets
-
Used for web-based voice conversations (e.g., website live chat)
-
Go to Deploy Tab → Web Widgets → Connect widget
